Showing posts with label Flowers. Show all posts

Thursday, May 22, 2014

A New Business Website

As some of you may know, several years ago I started a wedding flower business. Flower arrangements are one of my passions. I can't imagine not working with flowers, even if it's more of a hobby at this point than a source of income. It's a fantastic creative outlet and it's certainly provided me with great opportunities.

In an effort to continue bringing in those opportunities, I created a website for my business. Initially I used Wordpress to help me build what I wanted, but I found the interface to be too difficult to use. So recently, I made the switch to a website builder called Wix and I couldn't be happier with the results.

Here is the URL for my business, Big City Blooms - www.bigcityblooms.com. If you know anyone looking for a budget-friendly florist in the Pacific Northwest area, please send them my way!

 Seattle wedding flowers and bouquets

Monday, February 18, 2013

My Floral Portfolio Finds a Home

With a little help from one of my friends who specializes in graphic design, I've finally been able to build a website for my floral business, Big City Blooms

There are still a few updates to be made, but I'm satisfied with the product overall. Have a look and let me know what you think!

Tuesday, August 28, 2012

Dressing Up the Yard

I was just working in the yard and couldn't help but think about things I'd like to do with it once time and sunshine permit next year. Since our house is an old craftsman, I'm drawn to the idea of incorporating antique elements as focal pieces throughout the yard.

These garden beds grown inside of old dresser drawers are so charming, aren't they?  I also love the idea of repurposing the drawers themselves as stand-alone planter boxes. Very wallet-friendly!


Friday, July 27, 2012

Wedding Preview

It's wedding time again. Hooray! I get to do what I love and make somebody else's day special. You can't beat that feeling.  Luckily, the bride for this wedding was very easy to work with and gave me complete freedom to do whatever I wanted so long as I added yellow gerber daisies and "some white flowers for contrast." I'm pleased with the results and I think the bride will be too.  

I'll be sure to share photos post-wedding. Professional photographers have a way of making my arrangements look like works of art! Until then, here's quick preview of the bouquets:

>

Wednesday, January 11, 2012

January Designs & Flowers By Birth Month

Our dining room table has felt a bit sparse after removing our holiday decorations so I went searching online for some centerpiece inspiration.

This one is simple, but so colorful - gerber daisies, hypericum berries and a little bit of freesia.


But this one feels more like winter to me - white roses wrapped in twigs. It feels a bit more dramatic, but elegant at the same time.

Of course, this one would be best suited for this month since carnations are the birth flower for January:


I'll have to dig around my vase collection and see what I have. Maybe that will help determine which one of these gets arranged...

Also, in case anyone is curious, here's a complete list of birth months and the flowers associated with them. Hopefully it inspires you to add a little floral beauty to your dining tables too!

January - Carnation
February - Iris
March - Daffodil
April - Daisy
May - Lily of the Valley
June - Rose
July - Larkspur
August - Gladiolus
September - Aster
October - Marigold
November - Chrysanthemum
December - Narcissus

Tuesday, November 15, 2011

Flowers, Friends and Future Celebrations

Hi readers! It's been about a week since my last post - apologies! We had a house guest last week and I was busy preparing the flower arrangements for a family wedding before that. Since then, I've been preoccupied with planning my 30th birthday party.

I don't have professional photos to share with you yet, but here are a few photos I snapped at the wedding. There wasn't a huge budget to work with, but we pulled everything together somehow. Most of the arrangements featured white roses. I also mixed in queen anne's lace, white stock, new zealand pittosporum, green hydrangeas and gardenias.


Monday, October 24, 2011

Amanda's Wedding Flowers - Part 2

Greetings readers! It's been a few weeks, but I'm finally back from vacation and ready to share some awesome things with you, the first of which are some of the photos from a wedding I did last month.  These are the wedding photographer's photos so they make the flowers that I put together look all nice and shiny (much better than the personal photos I snapped with my iPhone).  If you love flowers as much as I do, take a peek.


Monday, September 19, 2011

Floral Favorites - Amanda's Wedding

As promised, here's a snapshot of some of the stuff I put together on Sunday for the wedding. I wish I had better photos to share, but I think these relay the general idea.  Once the official wedding photographs come back, I'll post the real glamour shots.

One of the bridesmaids bouquets.  Made with tulips, stock, lisianthus,
dahlias, bells of Ireland and peacock feathers!
Getting ready to load the bouquets into the car for delivery...
I snapped a quick photo with my iPhone after delivering
everything.  It's a tad dark, but it turned out better than
I thought it would!
Two of four men's corsages. 
Another one of the men's corsages sans pretty box.
Two of seven women's wrist corsages made with spray roses and purple stock.

Friday, September 16, 2011

Fun Friday Things: Let The Weekend Begin!

Well folks, I'm officially signing off for the weekend.  I'm doing the wedding flowers for a family friend this Sunday and there's still plenty of prep work ahead of me today.  Not complaining - I'm actually pretty excited about it!  I'll be sure to post pictures on Monday.

Have a good one!

Sneak peek of the bridal bouquets


Friday, August 5, 2011

Celebratory Sangria

The big news this week is that I got a new job!  I'm going to be managing the marketing programs for a start-up company here in the Seattle area and I couldn't be happier about it.  I just found out that I start on Monday so thankfully, I still have some time to mentally prepare myself for the demands of the job.

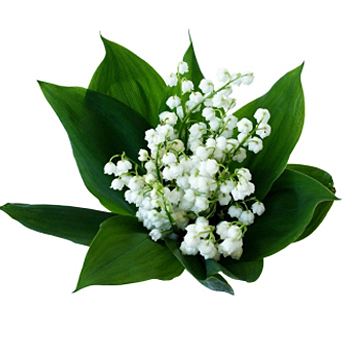
So far my mental preparations have included making a pitcher of my secret sangria (recipe below) and buying myself a nice bouquet of flowers.  Things are looking up! ;)


Shelbey's Not-So-Secret Sangria Recipe:
  • 1 lime, rind removed and sliced in quartered circles
  • 1 lemon, rind removed and sliced in quartered circles
  • 1 orange, rind removed and sliced in quartered circles
  • 1 plum, sliced in cubes 
  • 1 apple, sliced in cubes
  • 6 strawberries, sliced in quarters
  • 1 1/2 cups of Mt. Gay rum
  • 1 cup of orange juice 
  • 1 bottle of red wine
  • 1/2 cup of white sugar (can also use Sugar in the Raw)
1) Mix the sugar, fruit and rum together in a pitcher.  Put into the refrigerator for 2 to 4 hours.
2) Add the wine when ready to serve
3) Pour a glass and enjoy! Be sure to scoop the fruit into your glass for added texture and taste.  Serves 6   people.

*For a less alcoholic mix, replace the rum with juice.

I've shared this on:

http://runwithglitter.blogspot.com/

Tuesday, May 10, 2011

An Occasion For Ombre

It's almost summer, which means I finally get to break out my super comfy and colorful ombre dresses and skirts!  In fact, I got a jump start last weekend and pulled them all out of my closet in gleeful anticipation of the next heat wave here in Santa Monica.

I've always loved the way the colors blend together in ombre pieces so I got to thinking...  wouldn't it be fun to apply the same look and feel to flowers?  Hence, I present my attempt at creating an ombre floral arrangement:


If you're curious about the kind of flowers I used, I stuck with a single species - carnations.  I'm not a huge fan of carnations, but they are cheap and come in all sorts of pretty pastels this time of year, making them perfect for color blocking.  Plus, they make a great filler so it's hard not to end up with a plentiful arrangement. 

Instructions:
  • Pull together as many small pots as you'd like.  I purchased these red pots at JoAnn Fabric for a total of $8.00, but you can use anything really.  I recommend keeping the base the same color.
  • Cut 2-3 floral foam blocks (the kind you soak in water) to fit the vases.  The top of the block should be just below the rim of the vase after it's laid inside of it. 
  • Soak the blocks until they float, then place inside the vases. 
  • Cut your flowers so the stems are 2 to 4 inches in length 
  • Poke into the floral foam block, creating a nice, round shape as you go. 
  • Arrange the vases in an ombre color scheme (they should gradually blend together)
I've shared this on:

Monday, May 2, 2011

Romantic Rose Box

I took another trip down to the flower market this weekend and picked up some beautiful coral-colored roses and some bells of Ireland for filler.  I planned on throwing them together in a clear vase for a simple look, but as you can see, I ended up with something completely different.  The best part?  This arrangement didn't cost me much at all!  If you like it, here's how you can make one too:

You will need:
  • 9 to 12 roses or a similar flower with a thick stem 
  • 4 stems of bells of Ireland or moss
  • 1 large square of floral foam. It must be the kind you soak, not the kind used for silk flowers.  I've used Oasis Floral Foam in my example.  It can be purchased at most craft stores for around $3.00 
  • 1 box of your choosing, preferably with a plastic liner. If you don't have a plastic liner, you can use a piece of tupperware in a similar size to your box.  In my example, I've used a box purchased from the discount rack for $4.00 at a Michael's craft store.  It came with it's own plastic liner. 
  • Scissors

Steps:
  1. Cut the block of floral foam so that it fits tightly inside of your box 
  2. Then soak the block in a bowl of water.  You'll know it's done soaking after it sinks and then floats to the surface again. 
  3. While your block soaks, cut the stems of your roses or preferred flower so that the stems measure 3 to 4 inches. 
  4. Remove your block from the water and place inside of your box.  Your plastic liner will prevent any water damage so be sure that it's already inside the box when you transfer the floral foam into it. 
  5. Once the block is secured inside of the box, you can start poking your flowers into the floral foam. In my example, I've created three rows of roses, though a scattered arrangement would look beautiful as well.
  6. After securing the flowers, snip the blooms from your bells of Ireland and place all around your flowers, creating a border effect.  If you're using moss, you'll have less of a border and more of a soft edge.  Just be sure to cover any areas where the floral foam may be showing. 
  7. Enjoy your creation!

The front view.  The white tablecloth underneath helps
to draw out more color.
Surprise!  The back of the box. 
Front view again sans pretty white tablecloth. 

I shared this DIY guide at:

http://runwithglitter.blogspot.com/

http://craftskeepmesane.blogspot.com/


Craft Couture

Wednesday, April 20, 2011

Our First Floral DIY Project!

Over the weekend I had time to experiment with some of the leftover flowers from my trip to the market.  Inspired by some of my previous floral posts from last week, I came up with this little ditty.  I think it's perfect for summer and it's super easy to create!


Here's what you'll need:
  • 3 lemons; if you prefer limes, you'll need 8 to 10 of them
  • 1 mason jar; they sell these for 99 cents at most craft stores
  • 18 inches of your favorite ribbon
  • 1 bunch of your favorite spring/summer flowers; for my example I've used ox eye chrysanthemums
  • tape; floral tape preferred, standard tape will work as well
Steps:
  • Cut your flowers so they're the right height for the vase; in this example, I've cut them so they stand about 3 to 4 inches above the rim of the vase
  • You'll want to make a diagonal cut at the tips of the stems so they can soak up the maximum amount of water
  • Form a small bouquet by taping stems together; tape halfway between the base of the stems and the start of the blooms
  • Fill one quarter of the mason jar with water
  • Line the sides of the jar with slices of lemon, fill gaps with remaining lemon slices
  • Place bouquet inside of the mason jar; the lemons should be arranged tightly enough that they will secure the base of the bouquet so it doesn't shift
  • Fill remaining three quarters of mason jar with water; water should rise to the rim
  • Tie ribbon around the rim of the jar into a bow shape
  • Enjoy!


This DIY can also be found at:


Potentially Beautiful

Monday, April 18, 2011

Flowers For Friends

This weekend I had the pleasure of helping one of my girlfriends put together flowers for her wedding, which is this summer in a Japanese garden here in Los Angeles.  Of course this meant we got to visit the Los Angeles Flower Market, which is one of my favorite weekend haunts.  There are literally hundreds of vendors there, with shops specializing in everything from rare and exotic flowers to basic floral supplies.  A little slice of floral heaven!

Here's a taste of what I experimented with...

Pink cymbidium orchids with a handful of river rocks
and a few floating candles to top it off.

Three vases of varying size with tea lights
to add a touch of romance!

Mini calla lilies in multiple shades of purple create
an elegant, dramatic look.

Basic white calla boutonniere sans any accoutrements.

P.S. Stay tuned for an additional post this week highlighting A Desire To Inspire's first do-it-yourself  floral project.  It's quick and easy to create and serves as an adorable centerpiece for a summer barbecue!